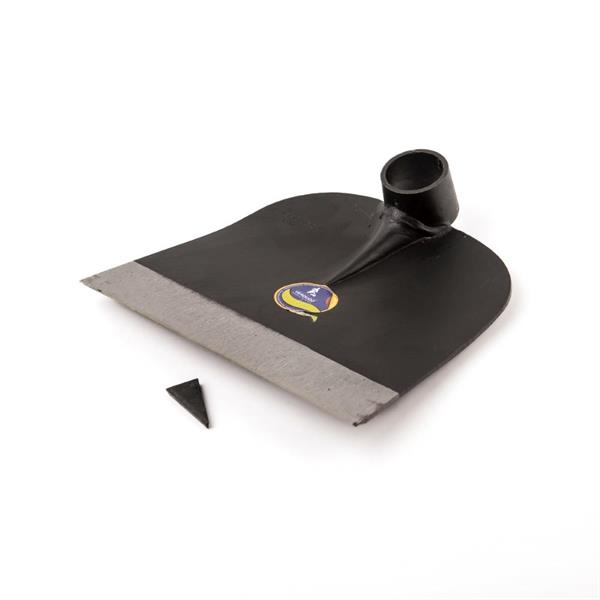
Blade hoe broad
Moves soil and cut rough weeds
- In stock
Description
In Sweden, blade hoes have been almost impossible to find. But abroad they are widly used instead of shovels. These high-quality Portuguese hoes are excellent tool companions and can be sharpened to a sharpness similar to axes. With a fairly blunt edge angle, they can be used with force straight into roots, stumps, etc.
I find that this extra-wide blade hoe is best suited for soil work and tougher weed clearing. If you want to remove the grass layer from a lawn with a blade hoe before sowing meadow seeds or for establishing a vegetable garden, the wide blade hoe is great!
When working in marshes, cutting tussocs, the hoe should be sharp and cutting horizontally. In that case, it's good to cut the handle to about 65cm so the "strike" can pass between your feet without hitting your groin (if you have one) at the same time. Carve out a knob at the top of the handle and make it slightly oval for better grip when hands and handle are slippery!
Made of slender, approximately 3 mm thick steel. The hoe is slightly curved from the attachment point towards the edge but flat along the edge. 23 cm wide at the edge, 18 cm from the edge to the shaft attachment.
Weight: 1.5 kg (hoe + 70 cm handle).
How to prevent the handle from breaking:
These handles are very strong and can withstand the most powerful strikes without issue. However, they cannot be bent with unlimited force—this is often when the handle breaks. Avoid prying up roots and stones with full force. The risk of breakage decreases with shorter handles. Personally, I’ve come to prefer handles around 50–55 cm—lighter, more maneuverable. I often work while kneeling.
Handles can also break if, during a swing, they accidentally hit something with a "sharp edge" (e.g., a branch or stump edge) before the hoe reaches its target—similar to snapping a stick over your knee.
Handles can last a very long time but not forever. If you use your hoe frequently and with enough force, you will eventually need to replace the handle.
Spare handles are bought separately and it may be worth considering having them at home!
Assembling
Video demonstrating shaft assembly
Let the handle dry indoors near a radiator for a couple of weeks first—it should be as dry as possible before being hammered in to ensure it stays in place.
- Attach the hoe to the handle. In the video, we apply grease to the handle, but this is not necessary.
- Use a sturdy anvil or similar surface as support, the broad how lacks the good piece of metal that acts for supporting - so they are a little trickier.
- Hammer the handle firmly into the hoe using the back of an axe or a sledgehammer. The better the support, the more you can drive the handle in.
- If, after hammering, more than 1 cm of the handle sticks out, saw it down to a maximum of 0.5 cm.
- Finally, hammer in the wedge. Done!
When we assemble them ourselves, only about 1 in 10 handles need to be trimmed—the rest can be hammered in fully.

